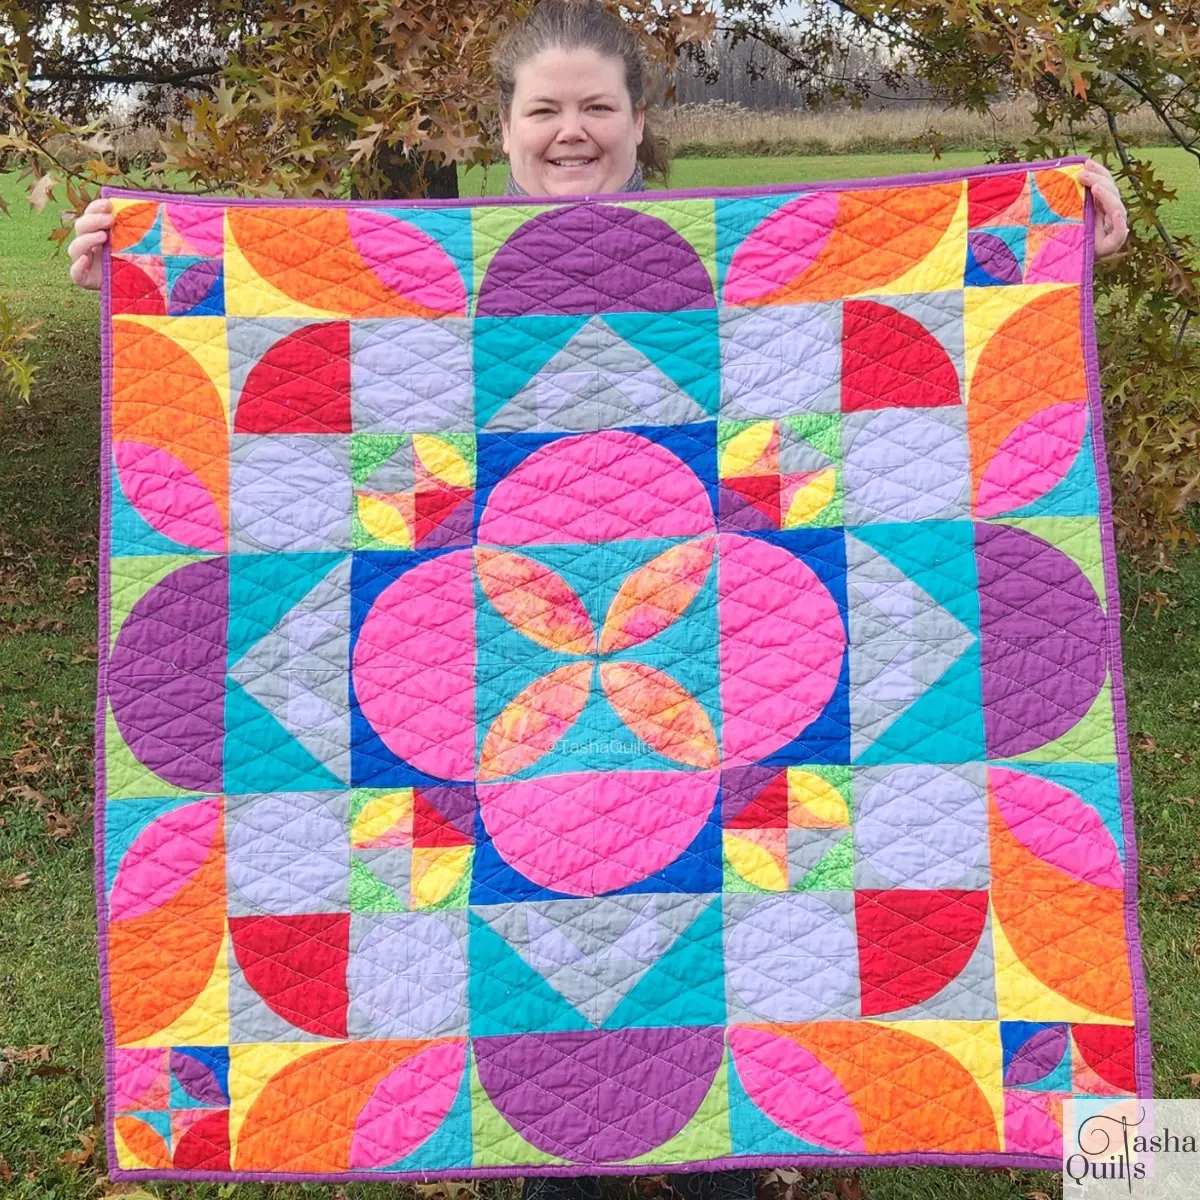
Restructured Square Block Tutorial (24″ Finished)
I am FINALLY done with this quilt – yay! I am highlighting it as part of my first TGIFF (Thank Goodness It is Finished Friday) – go to the bottom of the post to add your link before the party is over!
This quilt block comes together quick and creates an amazing secondary pattern when assembled into a quilt that feels like an optical illusion. I created this as part of our July challenge in the Clubhouse and many of you have been asking how it was made – so I finally got my act together and got it all documented – I hope you enjoy! The YouTube video on this one should be live before the end of the weekend!
This site is a participant in the Amazon Associates program, as well as other affiliate programs. As an Amazon Associate, I earn from qualifying purchases. This post may contain some affiliate links for your convenience.
For Each 24″ Block
For 1 24″ block – from each color – cut:
- (4) 3.5″ x 9.5″
- (4) 3.5″ x 6.5″
- (4) 3.5″ x 3.5″
- (8) 3.5″ Unfinished Quarter Circle Inner Templates*
- (8) 3.5″ Unfinished Quarter Circle Inner Outer Templates*
*You can get my free 3.5″ unfinished templates here. These do not contain any instructions. Or you can purchase the templates with instructions here. The templates with instructions are also available in the Clubhouse membership. You can find a video on how I make these blocks with the free templates here: Drunkard’s Path Block Made Simple – Telling All My Tips!
Note About Fabric Choice:
This quilt is all about CONTRAST. Therefore, you want to select two colors that pop against each other. If you can’t tell the difference between the fabrics, the design won’t be effective. You can take a photo of the fabrics with your phone and change to black & white to review the contrast to ensure that POP!
The fabrics I used were Kona Cotton in Black and Tula Pink in Taffy.

Step 1: Cutting Your Fabric
Cut out the fabric as noted above.
Step 2: Make Quarter Circles
Next, you need to make all of your quarter circles by pairing an inner template and an outer template of opposite colors. You should end up with 16 total quarter circle units. Trim all of them down to 3.5″. You can watch this video for a start to finish tutorial on my favorite way to make quarter-circle blocks!
Step 3: Assemble Quadrants
The 24″ block is made up of four 12″ (finished) sub-units. Construct two of each block below for a total of four blocks.


Step 4: Assemble Final Block
Assemble the final block using the (4) blocks assembled in step 3.

Step 5: Make More Blocks for the Optical Illusion!
Now, it is up to you how far you want to take this. I did 4 blocks in the 2×2 layout to experience the optical illusion, but I think a nice 3 x 3 layout measuring 72″ x 72″ would be so cool! Here is a mock-up of the 3×3, and you can see my 2×2 at the top of this post!

Quilting
For this quilt I decided to step outside my comfort zone and attempt to quilt it with the walking foot using an echo pattern. I did not anticipate what a shoulder workout it would be and how difficult making turns with the walking foot would be. However, I’m glad I stepped outside my comfort zone and actually tried to do some quilting vs. my usual straight-line quilting. I think it has opened up my mind to possibilities for this part of the process which I typically don’t enjoy!


TGIFF – Thank Goodness Its Finished Friday
I am so excited to be hosting my first Linky Party/TGIFF party! Please link below to show me all your favorite finishes! Make sure to check out all the fabulous finishes that are linked below and share the love on all the beautiful finishes!

Links
This post was also linked to:
Finished or not Friday: Alycia Quilts – Quiltygirl: Finished!!! Or NOT!! Friday!!
Keep in Touch
Want more content like this? Keep in touch!
YouTube channel: https://www.youtube.com/@TashaQuilts
Membership: https://clubhouse.tashaquilts.com
Instagram: https://www.instagram.com/tashaquilts/
Facebook: https://www.facebook.com/tashaquilts
Pinterest: https://www.pinterest.com/TashaQuilts/
Website & Blog: https://tashaquilts.com
Newsletter: http://tashaquilts.com/newsletter


This quilt is lovely, those curves bring the quilt to life! You did a great job with the quilting, happy stitching!
Thank you so much!! The quilting was way outside my comfort zone, but I’m glad I did it. Even though my shoulders are still feeling it. Thank you so much, I really appreciate it!
Wow, what a big impact the color placement makes. I love it!
Thank you so much!